
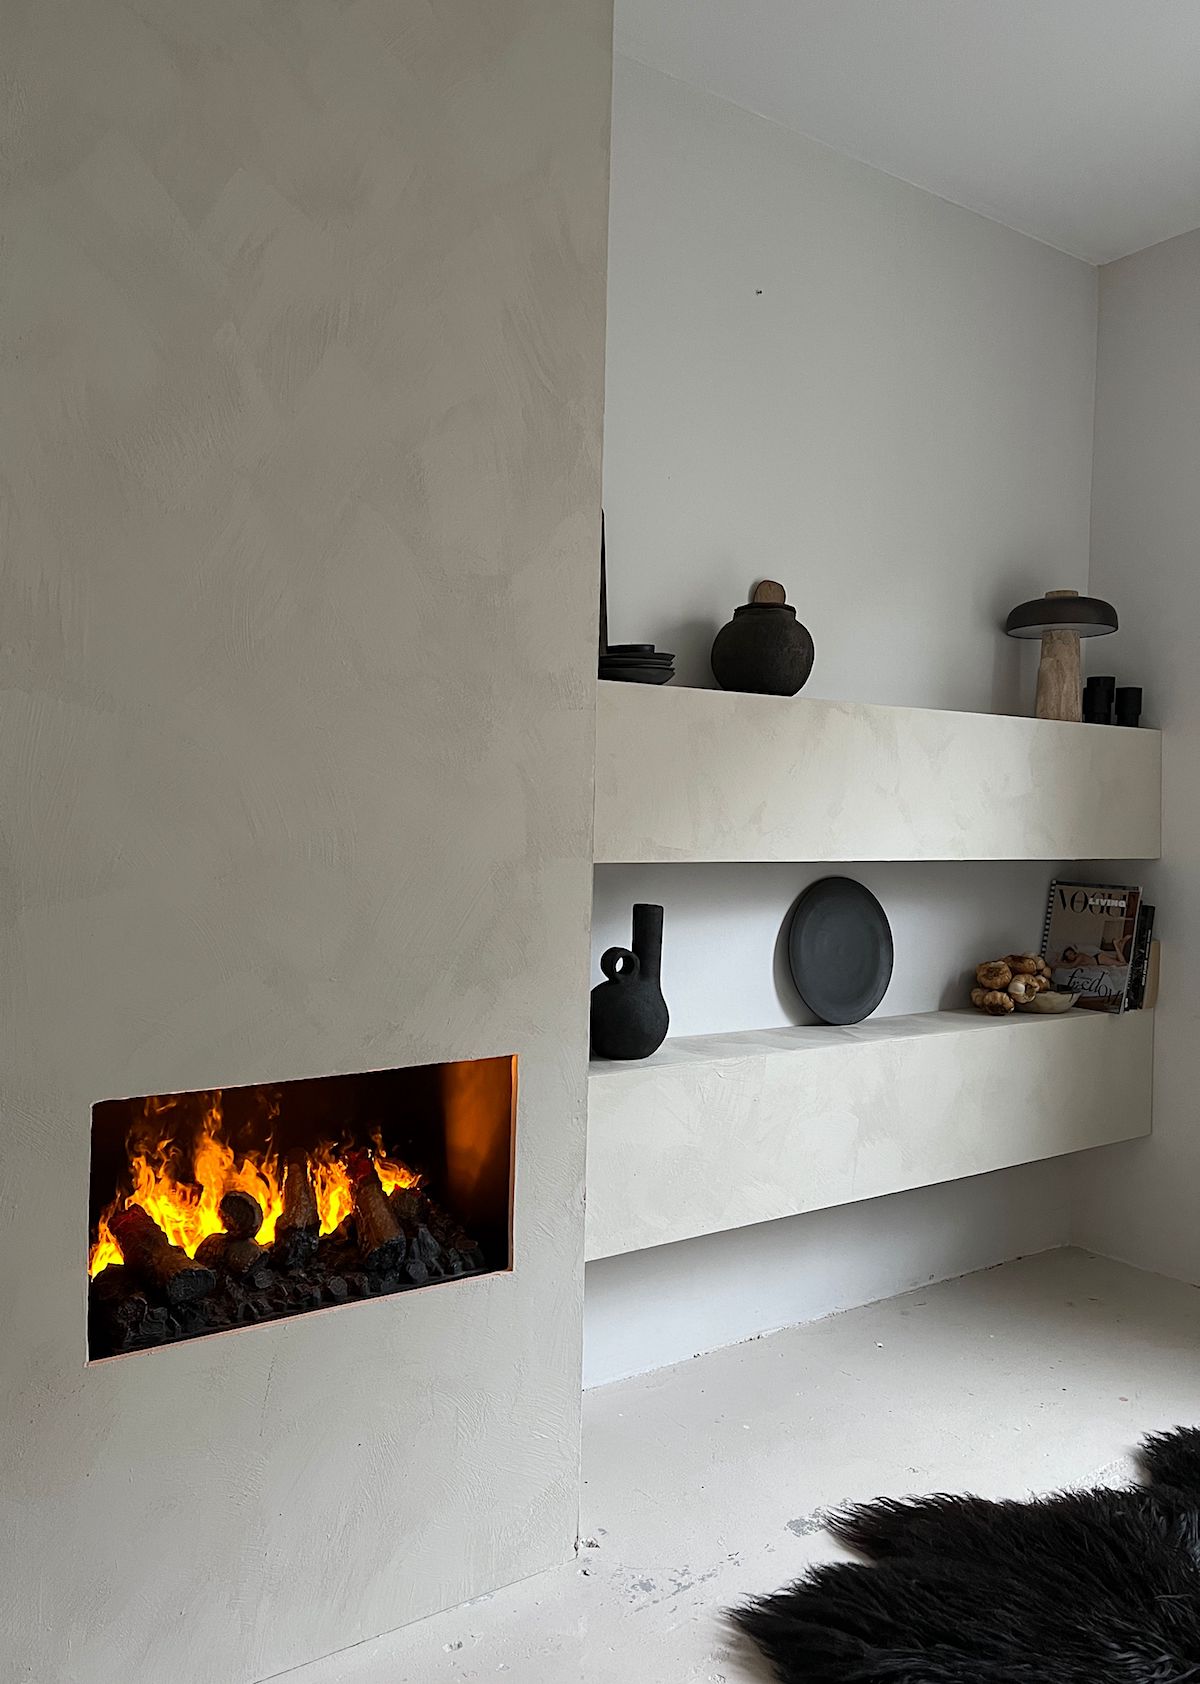
I am in no way a skilled carpenter or builder, but with a good dose of imagination and skills to find easy solutions I managed to do a lot at home myself. For my collaboration with Philips tv, read it here: Minimal design at home I built a bench out of multiplex which I painted black. You loved it, and so did I. Soon after I realized my next project, a 5,5 meter bench with a fire place build in: A fireplace for my home
I really loved the fireplace but for the kitchen I wanted a more traditional chimney idea. One that would also block the red glow from the LED lights on my ceiling. I could have hired a professional carpenter, but I love to challenge myself and the process of creating something that I clearly see in my head.
fireplace conversion
Instead of designing a frame for the ‘chimney’, I thought of a fast solution and bought a wooden rack cabinet as a base. (sencys via Praxis) This also immediately gave me the opportunity to place the dimplex cassette at the correct height on one of the shelves. In addition, the air could circulate properly through the open shelves. Find the steps on how to make one below.
The shelves
For the shelves I hung 3 basic shelf supports (20×15) for each shelf. The shelf itself is 20 cm deep and made of 12mm mdf, just like the fireplace conversion. On the front I glued a few left over pieces of mdf to make a larger surface to glue the front against. Finally I sawed the front from 6mm thick mdf board. Each front is 30 cm high and the length of the planks (in my case 180 cm) between the two shelves I kept a space of 35 cm. The socket is also hidden behind the top shelf. and as you see on the last picture perfectly hides the cable from the dimplex fire.
5 easy steps to build a fireplace
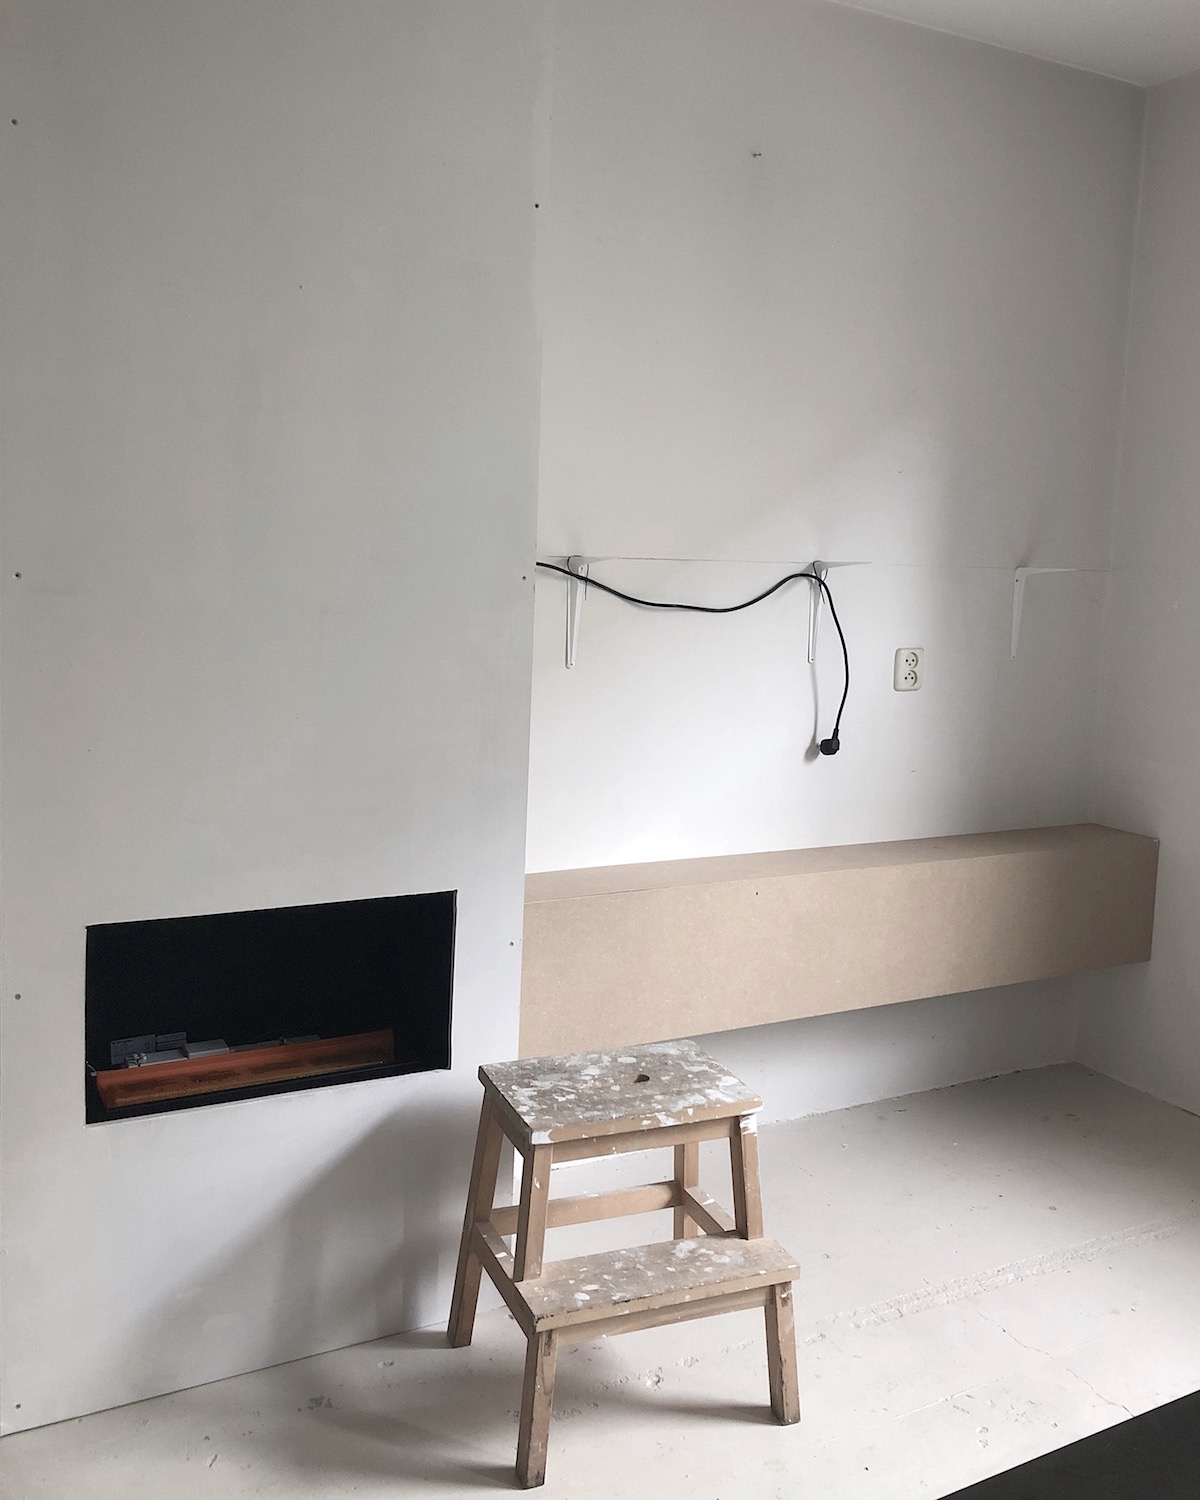
1 Secure the cabinet (mine was 170x75x40cm) level against the wall with 2 hooks.
2 Measure the level at which you want to place the fireplace, with this shelf rack I could easily place the shelf at the correct height.
3 I painted the shelf black and placed some residual wood on the inside behind the cassette, and at both the sides that I also painted black. On the right side I made an opening where the plug could be led to a socket I placed under the cassette from where I led the cable up between the inner side and the outer side.
4 Cover the sides with a 12mm mdf board that is 244 high (my room height) and 40 cm deep. you screw this to the side of the rack. On one of the sides I made the necessary ventilation opening as indicated in the Dimplex manual.
5 Measure the total width for the front of the cabinet and make sure you make the hole at the front big enough to take the fireplace out and fill the water cassette. I made a hole of 30×57 cm placed about 43 cm from the floor. I used a cardboard mall to make sure I cut out the right sizes to take the dimplex out. And to avoid LED light illuminating the ceiling.
A last few notes …. I had no intention to make a proper DIY post and made no pictures of the process, except for the image above, a quick I phone shot for a friend. Despite my English, I’m not used to describing things like that, I hope you liked the post. In my next post I’ll tell you more about the plaster I used for the finish.
As the rack is only 170cm heigh and my ceilings 245cm, I would advise you to build a proper frame if you have really high ceilings. Also I had the mdf cut to size at my hardware store. If you get the chance to have it cut in miter, I would go for that option.
Also if you are looking for fantastic diy ideas have a look at the account of talented Tanja van Hoogdalem She explains a lot of projects she made for her home and for the tv shows she work for. I must confess that I went for this fast and easy solution also because I don’t have all the right equipment.